Thursday, December 24, 2009

APPLICATION OF KUSAKI-ZOME

FOR DIRECT APPLICATION KUSAKI-ZOME for batik, tie dye, stenciling, painting, and block printing


MAKING SOY MILK or GOJIRU


Before applying natural dye it is important to wash the fabric to remove all commercial sizing. In addition it is necessary to prepare the surface of the fabric. A mixture of soy bean milk and water brushed over the surface of the fabric, acts as a size. It helps to insure dye absorption, and prevents streaking. It also helps do keep dye from seeping under any resists. The fabric undergoes a structural change known as denaturation when brushed with soy bean milk. The protein in the milk is rendered insoluble and forms a permanent size on the fabric. This helps to reinforce the bond between the dye and the fiber.

Powdered soy milk from the health food store can be used. It can be mixed according to the directions on the package.

Whole milk can also be used in the proportions of 1 part milk to 4 parts water.

-----------------------------------------------------

TO MAKE SOY MILK

Measure by volume:

Dry soy beans........................500 cc. Add enough water to the soy beans to make 1 liter.

Allow them to soak at least 24 hours before using. After soaking, the beans will make about 800 cc. of softened beans. The softened beans may be refrigerated or frozen until needed. The frozen beans should be defrosted before using.

Add enough water to the softened beans to make 1 liter of beans. Liquify in a blender. Strain through a moistened cloth to remove the vegetable matter. Add 10% sodium alginate before applying to the fabric.

--------------------------------------------------------------

Before applying the milk the fabric should be stretched tightly on a frame or with Japanese harite and shinshi (tenter hooks) Paint the milk on the front of the fabric. Turn the fabric over and wipe on the reverse side with a clean cloth or brush. The milk is only applied once. The fabric that has been treated with milk must be dried quickly. This can be done easily by brushing on the milk in the sun, placing a heater near the fabric, or turning up the heat in the room. A hair dryer works well for small pieces. If the milk is not dried quickly it has a tendency to sour on the fabric. It is not necessary to apply the milk to yarn or fabric that will be immersion dyed. If yarn will be directly dyed for ikat it will be necessary to paint on the milk while the yarn or fabric is stretched prior to painting or tying.

When the milk is dry, apply the dye on the fabric or yarn using a brush, stencil, or by painting.

When dried the dye can be applied again. This may repeated several times until the desired shade or color is obtained.

To change colors, different dyes may be applied one over the other or mixed together before using. To deepen the colors the mordant may be applied alternating between applications of color.

If the dye beads on the surface of the fabric or yarn, a drop of glycerine can be added to the dye, Glycerine breaks the surface tension of the fiber allowing the dye to soak in.

FOR IMMERSION DYEING

Yarn or fabric must be washed to remove all sizing, grease, spinning oil and and must be wetted-out before dyeing. Then the fabric may be tie dyed, or just immersed into the dye.

After the dye is extracted, the yarn or fabric is boiled in the dye bath for 15 to 20 minutes. After cooling down it is then placed in the mordant bath for 30 minutes and then washed in water. The dye liquor is heated once more. The mordant treated fibers are again placed in the same heated dye. This process of mordant, then dye can be repeated several times to get the desired color. When finished the yarn should remain in the dye until it cools. It is then removed and washed in clean water several times. After washing, the fiber is left to dry.

Tuesday, December 08, 2009

IMPORTANT POINTS FOR ALL DYES: FRESH, DRIED AND EXTRACTS.

Let the dye stand overnight to settle any remaining particles. Pour off and save the upper liquid and throw away the sediment.

The dye can be stored in the refrigerator. It should be covered with plastic wrap that is pushed down onto the surface of the dye, sealing air from the dye. Then the container should be capped. Since the dye is a natural substance it can become moldy if not used quickly. If mold should form on the surface of the dye, remove it carefully and test it. If the color remains satisfactory it can be used. The dyes can be stored in the freezer.

The life of the dye can be preserved by adding 20 to 50cc of phenol per 1 liter of dye.

If the dye has separated it might need additional boiling.

Extract and store all the dye that you will be using for one project at the same time. Natural dyes differ even though you might be using the same substance each time. Color from natural material varies. During the growing season there might have been more rain one month than another. One field might have more nutrients than another. All these factors affect the colors that would be obtained.


Tuesday, November 03, 2009

EXTRACTING THE DYE FOR KUSAKI-ZOME

DYE MATERIAL~EXTRACTION WATER BOIL TO STOCK SOLUTION

100 grams 1st...................700 cc..........300 cc. .....Total
of dried or
fresh dye 2nd.................700 cc...........300 cc. ..... 900 cc
material.
3rd..................700 cc...........300cc.


First Extraction

Mix the dye material with 700 cc. hot water. Boil until 300 cc. of the liquid remains. This will take about 20 minutes. Strain and save the liquid.

Second Extraction

Return the same dye material to the pot and add another 700 cc. of hot water. Boil until 300 cc. of the liquid remains. Strain and save the liquid. Return the dye material to the pot and add the hot water. Repeat these series of extractions until all of the color is removed from the dye material.
Leaves, grasses and flowers may only need 1 to 3 extractions. Flowers such as marigolds that are rich in color may be boiled 4-6 times. Bark may need 4-6, leaves 2 extractions, and wood 8-10 extractions.
Roots, wood and bark can be softened by soaking overnight. To extract the greatest amount of dye, the dye material may be boiled up to 10 times or more. The process may be repeated as long as the material yields color. To extract more of the dye, after the first or possibly the second extraction, the harder substances may be softened sufficiently to be mashed, ground in a blender, pounded with a hammer or with a mortar and pestle.
The dye from the 1st, 2nd, and 3rd extraction should be kept together. The 4th, 5th and 6th should be kept together and so on. After repeated extractions, the liquid will gradually become lighter and lighter as as more and more of the dye is removed. Sometimes the liquid from the second boil will yield the darkest extract. This is because the dyestuffs will have softened during the first boil.
The liquid from the 1st, 2nd and 3rd extraction will be used for the darkest color. The 4th, 5th, and 6th liquid for the medium color and the subsequent extractions for the lighter colors.
The extraction process will make a stock solution that can be used for both immersion and direct dyeing.

SAPPAN WOOD AND MADDER
--------------------------------------------------------------------------
DYE EXTRACTION WATER BOIL TO TOTAL STOCK SOLUTION
--------------------------------------------------------------------------
Sappan wood 1st......1500 cc.......400 cc.
or
Madder 2nd.....1500 cc........400 cc. to 1200 cc ..400cc
300 grams
3rd......1500 cc........400 cc.

After combining the liquids from the 1st, 2nd, and 3rd extraction. Add the total amount of liquid (1200 cc.) to a pot and reduce the liquid again by boiling to 400 cc. This will make a very concentrated stock solution.

TANNIN

Madder, sappan wood, and Brazil wood have similar coloring compounds. After treating the fabric with mordant, these dyes on cotton require the application of tannin to the fabric . Although cotton is in general very inert towards solutions of organic acids, it appears to possess considerable affinity for tannic acid, and will absorb it readily from its solutions.
If these dyes are combined with a high tannin bearing dye to make a new color, then tannin need not be used. Myroballan, sumac, gall, and fustic have high concentrations of tannin. In the mordanting of cotton for dyeing, 1 pound of pure tannic acid is equivalent to about 1 1/2 to 2 pound of gall-nuts, or 5 to 6 pounds of sumac leaves.

Tannic acid..........2% (1 gram)
Water.....................300 cc

As tannic acid is liable to suffer decomposition at the boil, giving rise to a brown color, it is not recommended to boil the mordant bath as the shade eventually obtained will be dulled. The tannin from this bath is not held on the fiber in an insoluble state. When the fiber is placed back into the dye some of the tannic acid passes back into the dye bath causing some loss of color. It is necessary to fix the tannin on the fiber by treating it again with the mordant.

INSECTS-Cochineal and lac
------------------------------------------------------------------------------
DYE EXTRACTION WATER BOIL FOR 1/2 HOUR
MATERIAL
--------------------------------------------------------------------------------
100gm.Cochineal 1st.......500 cc...2 grams soda ash...400 cc.

total stock solution 800cc

2nd......600 cc..................-0-.........400 cc.

Strain after each boiling, combine the two liquids for a total of 800cc.
To the 800 cc of remaining dye add 4 cc acetic acid and 20 to 50% phenol (as a preservative).
Do not add sodium alginate to cochineal if this dye will be used for direct application.
The addition of the soda ash to the cochineal will make a strong thick color. Finally strain the dye through a bag made of synthetic fabric to remove the last particles and sediment.

APPLYING DYE FOR KUSAKI-ZOME

APPLYING THE DYE

Natural dyes can be applied to fiber in two ways:

1. Immersion dyeing: Immersing the yarn or fabric in the dye liquid. Natural dyes can be used for ikat, batik and tie-dye.

2. Direct application: Applying color to fabric or paper by painting, printing, stenciling, and any other method that involves directly applying color to yarn, fabric, or paper.

The dyes can be used straight, diluted with water or mixed together to make additional colors. For the deepest colors it is best to apply the dye in separate applications, drying after each application. For immersion dyeing it is not necessary to dry the yarn after each dip.

The amount of applications depend on the depth, hue and value of color wanted. The dye from the first extraction is usually a nice clear color. The colors from the other extractions are sometimes a little grey due to the release of tannin from bark, wood, leaves and other substances with a high tannin content.

Wednesday, October 21, 2009

TEREYA CAFE


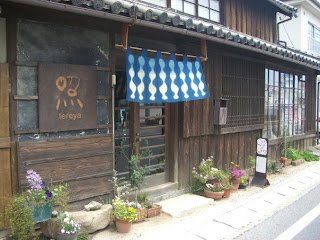
If you go to Ushimado to see Teresa's indigo dye you can eat at Tereya Cafe owned by Teresa and Hiroshi Kobayashi in Ushimado, Kurashiki, Japan.
Not only is this a popular coffee house but Teresa makes wonderful cakes, pies and food.

There are wonderful theme dinners, concerts and exhibitions at the cafe.

http://www.facebook.com/pages/Setouchi-shi-Okayama-Japan/Tereya-Cafe/120212699420


Full course meal in pumpkin created by a guest chef from Kakogawa. Live music by Natsukan, Okinawan jamisen and African drum duo.


Imamura san is a skilled Bosa Nova and Jazz guitarist who tours Japan all year long. This is the first time we have been able to schedule him.


Walnuts and maple syrup pie. Not too sweet and a crispy crust.


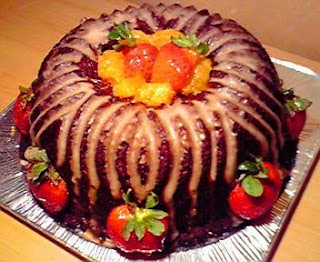
Someone ordered a birthday cake using Teresa's 'Depression Chocolate Cake' recipe for their grandfather with dietary restrictions. This is made with no butter, margarine or oil, no dairy and no eggs. What's in it? Everybody wants to know. Teresa uses whole wheat flour and beet sugar, good cocoa and mashed fruits. It really is delicious! It's a regular menu item and regular people order it all the time.

Friday, October 16, 2009

TERESA KOBAYASHI- INDIGO DYE

Teresa Kobayashi has her own indigo dye studio in Kurashiki, Okayama, Japan. It is called Dye House Tereya.

Teresa loves indigo as much as I do, as much as we all do!


Teresa Kobayashi explains her process in the following photos:

In order to get blue from indigo, which is a plant, you need a high alkaline, oxygen free atmosphere. These photos show one way of doing that; natural fermentation.
This is the ash used to make the alkaline solution.


This shows the indigo pot and alkiline solutions #1 and #2.
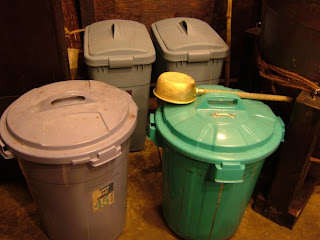
I put the ash into buckets and stir everyday for a few days. I make 4-5 solutions that range from ph30 to ph13 and are numbered, with #1 being the highest.


After stirring up the ash and water it gets real foamy.


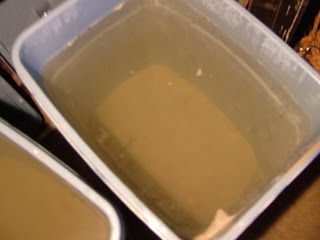
Alkaline solution #1, with the highest ph level. The ash has all settled to the bottom and the liquid is pretty clear.


Here are my buckets of alkaline solution.


The beautifully, clear ash water.
When the ash water is ready I start by filling the pot to about 1/3 full with the medium ph level of ash water and stir in the composted indigo leaves. I gradually add more ash water until the pot is full and the indigo is ready to use. I keep it maintained throughout its period of use (up to 6 months) by adding more of the higher or lower ph level ash water as needed to keep it at it's ideal level.


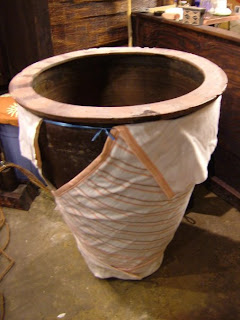
Even though I have this really nice 100 year old, traditional 'Ohtani Yaki' woodfired indigo pot, I have to cover it with an old electric blanket......


and then insulate it with foam. I have to do this because I need to maintain a warm atmosphere for the fermentation. Traditionallly these pots were buried part way and then a platform was built around them that came level to it's lip. Coal, was used between the earth and the top of the platform. I don't do it that way for several reasons.


I dressed my pot in a burlap bag and creatively wrapped hemp cord around it. This is purely to hide that ugly insulation sheet.


Since the bottom is so narrow, it is very unstable, so we rigged up a nice tri-pod and tied it securely.


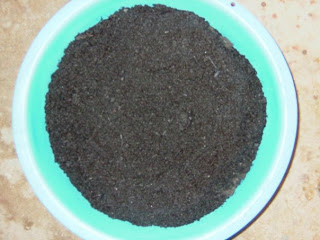
This is the composted indigo leaves. I buy this compost from an indigo grower who harvests the leaves and then composts them, for people like me to buy. It is filled with wonderful indigo bacteria.


Now, in order for me to be able to make use of that bacteria, which makes the blue color, I need to create an oxygen free vat. Here we go. First I sprinkle a little lime on to the composted leaves.


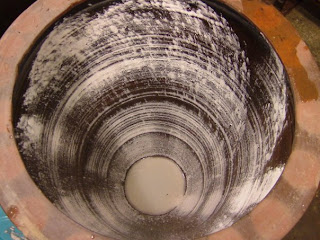
I also sprinkle lime on the inside of my pot. This helps to get rid of any weird germs or other bacteria that could be harmful to the indigo. This was the first time I used this particular pot and I had bought it at an antique store. Although it is a traditional pot made for indigo the last owners could have been using it as a goldfish bowl. It is over 100 years old. Did I say that all ready? I like this pot. It's kind of small, as they go. I have another, almost twice as big, now in the new studio.


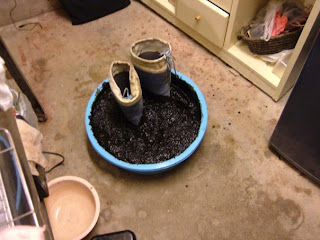
Then, I start stomping on it. I was standing in those boots before I took the picture. I don't know why I chose such a small container....I normally use one that is easier to move around in. Pretty silly now that I'm looking at it. HA!


So then I mix the composted leaves with a little alkali solution and put it in my heated pot. I keep adding more solution everyday. In this shot the pot isn't even all the way filled up and it has already started to ferment. The iridescent film on the surface is oxidized bacteria


I filled the pot up to the top and the indigo got quiet. That color is just the tanin from the leaves, and the foam from the ash water. After a day it will be iridescent again.


The pot is fermenting nicely and I have started to stir it daily. In the early stages the color of the bubbles that surface are a pretty turqoise blue. That color and that greyish foam means that it is still not ready for dyeing.


Here, there is a good 'indigo flower' (the name of that cluster of bubbles), but the surrounding area is kind of cloudy, with some greyish bits of foamy bubbles floating around. Not ready yet.


It is not ready to be used properly yet, but it is fermenting well, so I want to test the color with a small fabric swatch.


When I first take it out is is a green color (you can only see it on the one edge where my finger was, I was slow with the shot) until it oxidizes and then it turns blue.

Saturday, October 03, 2009

THE COLORS OF KUSAKI-ZOME

Kusaki-zome is Japanese for grass and tree dyes.


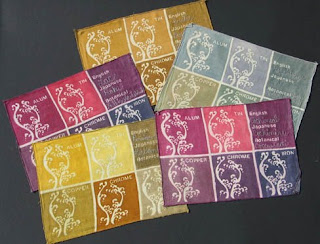
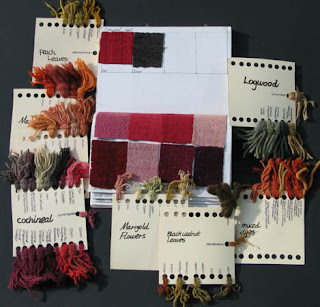
These are the various colors of kusaki-zome dyed on silk, kozo paper, wool fabric and yarn . These are some of the dye samples that I made in Japan.

I made a stencil and used rice paste as a resist to show the original fabric color. Some of the dye stuffs are pomegranite, lac, red cabbage, fustic, walnut, cochineal, peach leaves, logwood, and madder to name a few.


The samples show the different colors
that can be achieved using different mordants.


Kozo paper

Saturday, September 19, 2009

GENERAL DIRECTIONS FOR KUSAKI-ZOME

COLLECTING MATERIALS


The dyes can be obtained from leaves, bark, hulls, fruit, berries, nuts, grasses, flowers, lichen, insects and minerals.


Most plants will yield some color when boiled and processed for dye. The question is whether those colors obtained are worth the effort. In most cases the resulting color will be pale yellow, beige or pink and have little strength.


The dye substances can be used fresh or may be dried. It is best to gather them when they are in the best state for collection as a dye plant. To obtain the best color results they should be used immediately after they are gathered. Leaves should be gathered in early summer when they are young; flowers just after coming to bloom before the sun has a chance to fade them; the whole plant when the flower is in bloom; fruit when well ripened and bruised, roots when the plant has died down in the fall; bark should be collected in the spring.


To store for future use, the green parts and flowers should be dried out of direct sunlight. Dried plants should be stored in a dark place.


GENERAL DIRECTIONS FOR MAKING EXTRACTS OF LEAVES, BARK, HULLS, ROOTS, GRASSES, FLOWERS, AND FRUIT.


The following instructions are general directions for the boiling down of fresh or dried leaves, bark, hulls, roots, grasses, flowers and fruit.


1. The amount of water and dye material added to the pot are standard and may be increased or decreased according to the color desired.


2. The larger pieces of bark, roots, twigs, hulls and grasses should be chopped into small pieces. If the pieces are too difficult to chop, they may be soaked overnight or chopped in a blender or mashed after they have been softened by boiling.


3. The dyes are extracted using heat and a series of repeated boiling . The number of extractions depend on the dye substance.


4. To boil, the specified amount of water is put into an enamel, stainless steel or glass pot. A copper, aluminum, or chipped enamel pot will affect the color of the dye. Pots made of these metals will react with the dyes and mordants.


5. To speed up the boiling process the dye material may be added to hot water.


6. Boil the dyes uncovered for the required amount of time.


7. The dyes may be stirred with glass rods, dowels, wooden or stainless steel spoons


8. When the dye has been completely extracted and the depth of color has been achieved by combining dye liquors. Strain the dye through a finely woven nylon or polyester cloth bag or a piece of nylon fabric lining a plastic colander. This will filter out any fine particles that might remain to stain the fabric. Do not strain through a metal sieve unless it is made of stainless steel. Do not strain through a cotton or natural fiber bag as the bag will absorb and weaken the dye.

Saturday, August 22, 2009

RANRU AND BORO


Mottainai (もったいない, 勿体無い) is a Japanese term meaning "a sense of regret concerning waste when the intrinsic value of an object or resource is not properly utilized." It is originally a buddhist term that refers to the essence of things. It also applies to everything in the physical universe, suggesting that objects do not exist in isolation but are intrinsically linked to one
another.


Nai is a negation, and an expression of sadness over the repudiation of the ties linking all living and nonliving entities. It is also a concept that reestablishes such bonds and reasserts the importance of treating all animate and inanimate objects with great care. It can be understood as "What a waste", or the misuse of something that can be made valuable. It is finding the Buddha in the fabric.

It is similar to the concept of Gaia. Gaia is the Greek supreme goddess of Earth. The Gaia concept is an ecological hypothesis that the Earth is a self regulating complex interacting system that maintains everything, and that the climatic and biogeochemical conditions are interlocked.

The fabrics are pieced with no apparent pattern except for the aim of making a larger piece of cloth from the scraps.


They speak of decades of hardship in the home that made them. Each scrap sewn with care to cover damage incurred by use, giving it yet another life. They speak of an abhorrence of waste, of creatively making something new from something old, making something from leftovers.

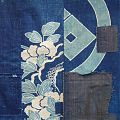
The pieces are sewn together sometimes with sashiko stitches. These fabrics can be made of either cotton, hemp or a combination of both. and almost all of the pieces shown will be indigo dyed in solids, shibori, kasuri (ikat), or shima (stripe) patterns; many will have combinations of multiple patterns.

This concept was an important one for western quilters of previous centuries who creatively made something new from collages of pieces of cloth that were pieced together in specific patterns.

The Japanese used the cloth to mend holes, reinforce worn areas of sleeping futon or work clothes. The cloth is layered to increase warmth and durability. The cloths are used to make futon, cushion covers (zabuton), furoshiki, dust and floor rags. Created because of the need for mending cloth, it is an unplanned art form. They are what happens when design and composition are intuitive and what exists determines the possibilities.

The sheer variety of tones of indigo, the juxtaposition of pattern, the scale changes between patterns and patches, the free-form and meandering stitching, the random assortment of color combinations is very beautiful.


The images of boro and ranru are used with the permission of www.ichiroya.com

Thursday, August 20, 2009

THE JAPANESE ART OF KUSAKIZOME

SOME HISTORICAL THOUGHTS

Because of climate, the growth of certain dye plants in India made available the raw ingredients necessary to print and paint bright colors on cotton. The availability of these dye plants, the time consuming processes to use these dyes on cloth and the dangers of travel before the 16th century made these dyes, fabrics and techniques relatively unknown in Europe prior to the 16th century.
In the West, the earliest recorded description of printed fabrics come from the Greek geographer Strabo (63 BC-20 AD). In the middle of the 17th century the Dutch and English, while trading in India, realized there would be a market for these printed textiles. They began to import them to Europe. By the end of the 17th century the popularity of these printed and painted fabrics, called chintz in the West, was well established.

In the East, during the Nara period (646-794 AD), the Japanese had became proficient in obtaining beautiful colors and patterns with simplified resist techniques using the same dyes. Much of their information on dyeing is thought to have come from India through China and Korea. The dyes and dyeing techniques brought by immigrants from Korea and China changed not only Japanese dress but introduced more colorful fabrics, as it did in the West 10 centuries later. The dyes affected the techniques used to pattern cloth and resulted in fabric that was typically Japanese.

Traditional Japanese resist dyeing techniques are the result of highly specialized craftsmen whose precision indicates that their skills were developed over a long period of time. The dye processes they used were time consuming, precise, tedious and labor intensive.

The Meiji restoration of 1867 brought reforms to Japan and contact with the West. Imported textile machines and synthetic dyes initiated changes and dye standards deteriorated. The dyeing techniques which do not lend themselves to mass production continue today mainly because of the Japanese appreciation of hand-crafted works. In Japan, the old dyes lacked a name to differentiate them from synthetic dyes. In 1958 Akira Yamazaki coined the term Kusaki-zome.

Kusaki-zome dyes may be applied to natural fabrics or yarn by immersion into a dye vat (batik or tie-dye) or by direct application (painting, printing or stenciling).

The kusaki-zome method of dyeing involves extracting the dyes from the dye material and making highly concentrated, stock solutions that can be stored in the refrigerator until needed.

The dyes can be purchased from dye companies, herb companies, the supermarket, grown in the garden or foraged in the fields. These dyes may be used on any natural fiber: cotton, linen, wool, silk, ramie, and viscose rayon. © M Joan Lintault